The MiniCut2d can be a very efficient educative tool : it allows you to use the leverage of digital production to encourage learners kids and adults to become creators of their own digital life instead of passive customers.
Bellow, you will find exemples of activities you can propose with your MiniCut2d. The competence’s field of the machine is really vaste, but direction always remains the same : Digital education for all those who want to become autonomous as well as creative.
Notice the MiniCut2d is also a really good tool for groups animation.
Activity 1 : first cuts by discovering the MiniCut2d and the software
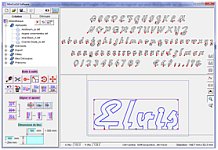
The learner discovers the library the ”creation” tab, which is free and can get installed on several computers. He uses an alphabet in a first step and just double clic on the letters that will compose a word.
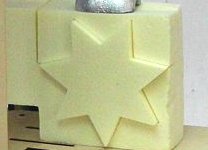
The learner also have to measure a real block of polystyrene and sets the measurments on the software on the screen. He can then make ajustements of the word on the block with extension and moving tools. The project is then saved and the learner goes next into the cutting part. He has to verify the process of in and out goings of the hot wire, handling the heat of it and lunch the simulation. When all parameters are set, the learner starts the real cutting, but never without the supervision of a skilled adult. The learner however has to control the cutting at anytime during the operation. |
 |
Activity 2 : get familiar with the tools
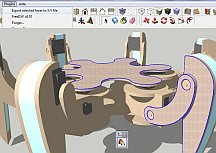
The learners’ objective is to put movement, fantasy into his initial project, by combining it with other elements picked in the library. Therefore, he will have to comprehend the fonctionning of all the positionment
and other adjustement tools’: moving, rotation, enlargement, hot wire checkpoints’ insertion, etc.
As it is possible to work with several computers on the same machine MiniCut2d, several learners can prepare their own simulations and lunch the real cutting on the machine according to the advancement
of each project. |
 |
Activity 3 : vectorization of a picture found on the internet
There is a double goal to reach here with firstly the transformation of an image/shape into a cut project
(with MiniCut2d Software or with Inkscape). The second objective is to comprehend the difference that exist
between an image composed of color pixels and the path of the hot wire composed by multiple checkpoints. |
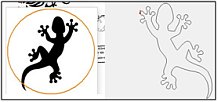 |
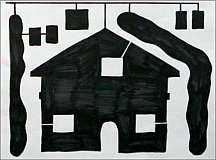
Activity 4 : vectorization handdrawned image
Now we know how to vectorize, It becomes possible to create and vectorize our own creations and hand
drawings. Those need to be photographed or scanned before being vectorized. This activity may lead to
multiple sessions and variations in order to optimize the precision in the production. The first approach may
start from a quickly done hand drawing.
We will then try to refine achievements, making them more precise. Therefore we will start with a pencil
made sketch and then exaggerate the final outline of the different parts. We then trace the shape on other
sheets with a thin black felttip, spreading the different pieces if there are several ones. We connect the
pieces with one another with a thin black line and the holes with a white corrector pencil. So the imagemust
absolutely be composed of a black area and a white one. For really precise pieces, the use of a scanner isstrongly advised. Otherwise a simple clear photo will do just fine. |
 |
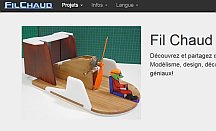
Activity 5 : share your project on hotwireprojects.com
Most insteresting achievements might be published on the sharing website www.frenchfoam.com. In order to make it more interesting and educative, you may take pictures of your project at different moments of its production, from its conceptualization to the assembling part and paintings. You may also write an explicative text for all the different parts of the progression
|
 |
Activity 6 : vectorization of a screen shot
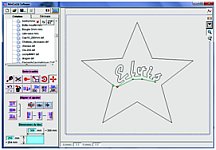
As for activities 3 and 4, the image to vectorize can be made through a text or illustration treatment software
(OpenOffice, Word, Illustrator, Inkscape…). The exemple shown beside was made using Word, putting each letter in its own text area so each one of them can be moved. A thin white line connect the “O”’s hole to the rest of the white area. You only need then to make a preview before printing and use the screen shot button so you can get the image. For the vectorization part, you can use MiniCut2d Software if you have a big screen, or Inkscape with a smaller resolution.
|
 |
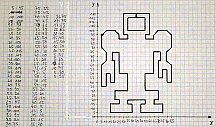
Activity 7 : checkpoints and coordinates
In order to make it clear to the learners that the wire goes from a checkpoint to one another, using each of
their coordinates, it is then possible to create a whole path using a x,y cartesian coordinate system :
Trace a geometrical figure, not too complex and write down all the coordinates associated with each
checkpoint, starting on top left and turning clockwise Report all coordinates in a text file (.txt) with a
checkpoint on each line and a “:” separating X and Y coordinates. The decimal separator is a “.”
You can find the exact format to use HERE.
Import the saved file in the library : it is then ready for the cutting part.
|
 |
You can imagine the next activities. Here are some ideas :